macOS notarization
Getting your application through macOS security
About
Nowadays, to run an application on macOS, you will need to notarize it. Otherwise, macOS will complain about the application not being notarized and calling it broken, even though it isn't. Even if you can work around this in theory by requiring your users to manually disable the quarantine for your downloaded application, you don't want to do this if possible to deliver a decent user experience.
Notarization is essentially the process of uploading your build application to apple servers and having their services scan your application for any signing issues. This means that if you have one dynamic library or other part of your application not signed or wrongly signed, the notarization will fail. If the notarization succeeds, you can attach a so-called staple to the built macOS application that certifies that this application is notarized, that way it also works offline.
The process of notarization is quite time-consuming and can take a few minutes. It also can fail sometimes if apple servers are down or get stuck. One way or the other, your build pipeline macOS runners are quite busy for some minutes just waiting for the notarization to finish.
KickstartFX is preconfigured to properly sign and notarize your application. The only thing you will need to do is to supply the correct signing information as described later. Not that if you don't do this, you can still build your application, but it won't be notarized.
Setup
The first step is to acquire an apple device, ideally a mac system. In practice, you will need some kind of apple device to properly set up your apple developer account and configure everything. The next step is to create an apple account and enroll in the Apple developer program.
Codesigning
The next step is to create Developer ID certificates as shown here: https://developer.apple.com/help/account/certificates/create-developer-id-certificates/. You will need to create two certificates, one application and one installer certificate for the .dmg and .pkg respectively. These .cer files will have to be converted into the .p12 format first.
First, convert the .cer into the .pem format:
Then, use the .pem file and the private key file to generate the .p12 file:
This will prompt for a password you can set for the exported .p12 certificate. Keep track of that password for later.
Then, you can obtain the base64 representation of the key with:
You can now fill the following environment variables:
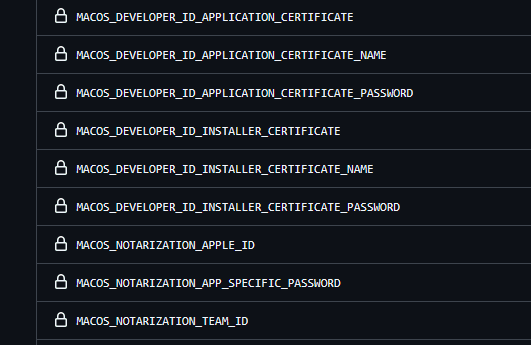
MACOS_DEVELOPER_ID_APPLICATION_CERTIFICATE- The base64 content of the application certificateMACOS_DEVELOPER_ID_APPLICATION_CERTIFICATE_NAME- The display name of the certificate, e.g.Developer ID Application: My Name (ABCDEFGHIJ)MACOS_DEVELOPER_ID_APPLICATION_CERTIFICATE_PASSWORD- The password you set when exporting the .p12 application certMACOS_DEVELOPER_ID_INSTALLER_CERTIFICATE- The base64 content of the installer certificateMACOS_DEVELOPER_ID_INSTALLER_CERTIFICATE_NAME- The display name of the certificate, e.g.Developer ID Installer: My Name (ABCDEFGHIJ)MACOS_DEVELOPER_ID_INSTALLER_CERTIFICATE_PASSWORD- The password you set when exporting the .p12 installer cert
With these environment variables set, either locally or in the build pipeline, you should be able to now codesign the generated .dmg and .pkg artifacts.
Notarization
The final step is setting notarization environment variables. These basically specify which apple account should be used to notarize your application and how you authenticate with it.
To access your apple account from an external workflow, you will have to create an "App-specific password". To create an App-specific password:
- Sign in to appleid.apple.com
- In the Sign-In and Security section, select App-Specific Passwords.
- Select Generate an app-specific password or select the Add button(+).
You can now fill the following environment variables:
MACOS_NOTARIZATION_APPLE_ID- The email address of your apple idMACOS_NOTARIZATION_APP_SPECIFIC_PASSWORD- The app specific password you just createdMACOS_NOTARIZATION_TEAM_ID- The developer team id, which you can find in the membership details at https://developer.apple.com/account/#/membership
If everything is configured correctly, the gradle build should now automatically sign and notarize your application.
In the end, you should have the following environment variables configured:

